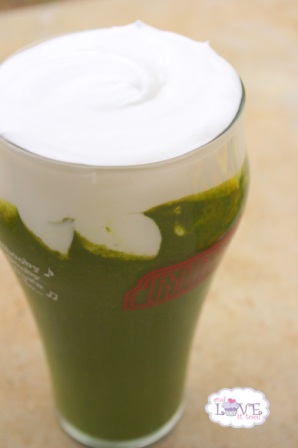
ICM, Giveaway and the Chocolate Mint Green Monster (AKA, the healthiest Shamrock Shake this side of the pacific)

Happy Ingredient-Challenge Monday!

As Shea and I announced last month, the 2nd Monday of every month is now dedicated to our ICM challenge!

As mentioned this past Saturday, we have a lot in store for you this month.

First, our featured ingredient for this month: Kale!

Like I have said before, I love love love my greens!  But of all the greens, kale is definitely at the top of the list.

Why?

It’s versatility.  Raw, cooked, dehydrated or blended into your favorite smoothie, this green packs a delicious nutritional punch anyway you chose to serve it.

Low calorie high fiber.  Can you say, win!?

One cup of kale has only 33 calories yet offers 5% of the daily value for fiber.  Additionally, one cup of raw kale also has 206% of your Vitamin A (for your eyesight, appetite control and taste buds), 134% Vitamin C (keeps your immune system strong), 9% of your daily calcium (for your bones, nerve function and more!), and 6% of your daily iron (keeps your blood healthy and your immune system strong).

Kale is also a good source of Vitamin K, Vitamin B6, Magnesium, Potassium, Copper, Manganese and more!

All this from one not-so-little leaf.

Seriously, kale does a body good.

Inspired by a delicious recipe from the wonderful book I reviewed this weekend, Eat Like a Dinosaur, Shea and I are pleased to open this ICM challenge with our own very green, wonderfully delicious kale recipes for you.


This smoothie has all of the markings of a delicious dessert, especially when topped with a dollop of coconut whipped cream (never mind the amount in the picture below, which was solely for aesthetics, really, a spoonful will do).  Even so, packed with raw fruits and vegetables, a powerful anti-oxidant punch from the raw cocoa and a good amount of protein from the raw cashews, even without the whipped cream, I have no doubt you will find lots of not-so-guilty pleasure in this delicious drink.

Heck, I’ve been drinking it every morning for the last week.

It is that good.

With approximately three cups of kale in each large serving…

Well, I’ll let you tally the nutritional value on that.

This is good stuff.

;)

Enjoy!

Chocolate Mint Green Monster (AKA, the healthiest Shamrock Shake this side of the pacific)

Ingredients

    Coconut Whipped Cream (Optional)
  • ¼ c Arrowroot Powder
  • ¼ c Palm Sugar
  • Cream from 1 can of full-fat coconut milk, refrigerated at least 48 hours (I prefer Thai Kitchen)
  • Smoothie
  • 2 sliced banana’s, frozen
  • 1 handful raw cashews (approximately ¼ c)
  • 1 c unsweetened almond or coconut milk
  • 1 Tbs raw cocoa
  • ½ tsp Mint Extract
  • 4 big kale leaves, stems removed and shredded

Instructions

    Coconut Whipped Cream:
  1. Refrigerate mixing bowl for at least 2 hours.
  2. Using coffee grinder or small blender, blend together arrowroot powder and palm sugar until completely incorporated.
  3. Remove mixing bowl and coconut milk from refrigerator. Scrape cream from coconut milk container, being careful to leave as much of the water out of the cream as possible. Place in chilled mixing bowl. Using stand-mixer, whip on medium-high or high speed for about 60 seconds. Slowly add arrowroot and palm sugar ‘powdered sugar’ mix until the ideal sweetness and consistency has been achieved. Refrigerate until ready to serve.
  4. Smoothie:
  5. Load ingredients into high-speed blender in the order shown. Blend until completely smooth. Serve as-is or with a dollop of coconut whipped cream.
  6. Makes 2 small or one large serving(s)
Schema/Recipe SEO Data Markup by ZipList Recipe Plugin
http://andloveittoo.com/icm-giveaway-and-the-chocolate-mint-green-monster-aka-the-healthiest-shamrock-shake-this-side-of-the-pacific/

:) Now that I have shared my kale recipe with you, won’t you share yours with us?

To enter this month’s Ingredient-Challenge Monday:

1. Simply link your kale recipe to the blog-hop below.

2. Link this post with your recipe, using the ICM logo (at the top of the post) or through simple mention in your individual recipe post (not your homepage).

3. You may submit more than one recipe, but please ensure you link each one correctly and only enter each recipe once.


What’s in it for you? :) We’re glad you asked!

Each month, Shea and I will select one winner from the ICM recipes shared and feature that recipe on our own page (double exposure, YAY!).

This month though, we have something extra-special for you.  Remember the lovely book from Paleo Parents?  Each entry into this month’s ICM challenge wins you the opportunity to win your own copy of Eat Like a Dinosaur!

:) Link it up, share your kale recipes and increase your opportunity to win!


Wait, what if I don’t have a blog?

That’s OKAY! There are more ways to win!

1. Do you have a fantastic kale recipe?  Leave a comment below with the recipe in full.  Shea and I will be happy to consider this in our monthly feature, and you will be entered into our monthly drawing.

2. “Like” And Love it, Too On Facebook, and leave a comment telling me you did.

3. “Like” Dixie Chik Cooks On Facebook, and leave a comment telling me you did.

4. “Like” Paleo Parents On Facebook, and leave a comment telling me you did.

5. Follow @andloveittoo On Twitter, and leave a comment telling me you did.

6. Follow @dixiechikcooksOn Twitter, and leave a comment telling me you did.

7. Follow @PaleoParents On Twitter, and leave a comment telling me you did.

Entries will be received through 11:59pm March 26, 2012.  Winners will be announced EOD March 27, 2012.

Remember, each action = 1 comment.  Each comment = 1 entry.  The more actions = the more opportunities to win!

Good luck everyone, we cannot wait to see what you come up with! xoxo


Roasted Fennel Infused Strawberry-Lemon Bars

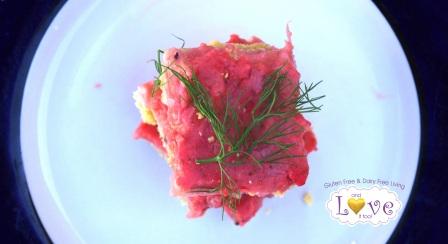
Two weeks ago, Shea and I opened a challenge to our readers.

Using our Ingredient Challenge Monday format, where we feature one whole-food ingredient and challenge our readers to join in on the creativity, we challenged each of you to use fennel in the most creative, most delicious way you could imagine.

To open the challenge, I shared my Maple-Glazed Roasted Fennel with Apples and Root Vegetables and Shea featured her decadent Smoked Sausage Dogs with Caramelized Fennel and Onions.

Then in response, we received absolute silence.

In hind-sight, opening to door to this challenge with two savory recipes in the month of chocolate, sugar and sweets probably was an error of poor timing on our part.

That being said, we love fennel and would still love to see how creative you can be with yours!

To help with this, we have extended our challenge by one week.

To enter, please include the Ingredient-Challenge Monday (ICM) badge (above), link the image on your page back to this link: http://www.dixiechikcooks.com/2012/02/06/smoked-sausage-dogs-with-caramelized-fennel-and-onions/, join in and grab on to the blog hop below.

Shea and I will feature one of your ICM recipe’s on each of our blogs at the beginning of the next challenge.

The challenge is now open until midnight; February 27, 2012…we do hope to see your creations!


…And to show that fennel is not all about the savory side of things, tonight I am happy to introduce a very sweet way to indulge on this heart-healthy delight.

These Roasted Fennel Infused Strawberry Lemon Bars are not your mother’s dessert.

Pan-roasting the fennel brings out the ever-so-subtle licorice flavor of the vegetable, adding a slightly savory undertone to this traditionally sweet treat.

Grain-Free, Sugar-Free and Vegan, these bars are sure to delight!

Enjoy!

Roasted Fennel Infused Strawberry-Lemon Bars

Ingredients

Instructions

  1. Preheat Oven to 350f. Prepare crust by mixing 1c palm shortening, almond flour and sea salt. Press mix into pre-greased 9x13 pan. Bake for 20-25 minutes, until lightly golden. Set aside.
  2. Over medium-high heat, melt 1 Tbs palm shortening in medium sauté pan. Add in diced fennel and roast until lightly caramelized, remove from heat.
  3. In blender, puree strawberries, lemon juice, lemon zest, arrowroot powder, filtered water and stevia. Add roasted fennel and pulse until fennel is finely diced or completely incorporated, depending on your preference (I like to leave a little texture/bite to my bars). Pour mix over pre-baked crust and bake for another 15-20 minutes, when mix appears firm. Refrigerate 1-2 hours until ready to serve.
  4. Makes 24 bars
Schema/Recipe SEO Data Markup by ZipList Recipe Plugin
http://andloveittoo.com/roasted-fennel-infused-strawberry-lemon-bars/

Don’t forget to join us! We look forward to seeing what beautiful creation you bring!

This post is also linked to: Slightly Indulgent Tuesday


Maple-Glazed Roasted Fennel with Apples and Root Vegetables

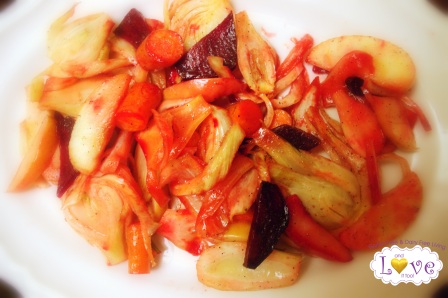
Just in case you missed the announcement last Friday over at Dixie Chik Cooks, Ingredient Challenge Mondays are back!

Don’t remember Ingredient Challenge Mondays?

Here’s are just some of my previous ICM entries


What’s different this go-round?


Well, like we did in the final ICM challenges from before, this time we are including a blog-hop and ask that if you choose to join us, that you will include the linky tool on your page as well (the tool at the bottom of the page will give you everything you need). We also ask that you include the logo above (simply right-click, save picture as, and link it back to our most recent ICM ingredient announcment…this month it would be: http://www.dixiechikcooks.com/2012/02/03/spicy-bbq-bacon-wrapped-chicken-tenders/).

Instead of a bi-weekly challenge, we are now opening the doors for a once-a-month challenge which will be opened the 2nd Monday of every month…

So mark your calendars! The 2nd Monday of every month is now Ingredient Challenge Monday! Yay!

We will announce the challenge ingredient either here on my page, or over on Shea’s page (Dixie Chik Cooks), the Friday before that 2nd Monday…and from the opening day, you will have two-weeks to link your recipe along with ours.

At the end of the two-week opening, Shea and I will select one winner to feature on our page.


That’s right!  Not only will your recipe be visible through the lovely linky tool below, you will actually have the chance to be featured on each of our pages…

With thousands of unique visitors every week, this is a great opportunity for you and for us!


We are happy to have you join us on this journey.


To re-open our Ingredient Challenge Monday opportunity, Shea and I would like to once again highlight one of our favorite, yet underutilized vegetables…Fennel.

As mentioned last year, fennel is high in vitamin c, fiber, potassium, manganese and folate, fennel is listed as one of the World’s Healthiest Foods. There are many health benefits that come with eating fennel including, antioxidant and health promoting effects, immune support from vitamin c, fiber, folate and potassium for cardiovascular and colon health.

We are tickled pink to share our recipes with you today!

Used as a side dish, this Maple-Glazed Roasted Fennel with Apples and Root Vegetables is a wonderful compliment to most any winter meal including the Braised Orange Roughy from before.

I look forward to seeing what you bring to the table this time!

Happy ICM to you! xoxo

Maple-Glazed Roasted Fennel with Apples and Root Vegetables

Ingredients

  • 4 Fennel Bulbs, tops reserved for another dish or discarded
  • 4 Large Carrots
  • 2 Medium Apples (Any variety, though I used Fugi in mine)
  • 2 Small Beets
  • ½ c Maple Syrup
  • ½ c Extra-Virgin Olive Oil
  • 1 tsp Salt
  • 1 tsp Pepper

Instructions

  1. Preheat oven to 400f. Prepare fennel by trimming and slicing into ¼ inch slices. Wash and cut carrots into desired chunks. Wash, core and slice apples into ¼ inch slices. Peel and slice beets, again into ¼ inch slices.
  2. In large bowl, whisk together maple syrup, extra-virgin olive oil, salt and pepper. Add vegetables. Toss until all are evenly coated and transfer into large parchment-lined roasting pan.
  3. Roast for 20 minutes, stir and roast for 20 minutes more or until vegetables are fork-tender. Serve warm.
  4. Makes 6-8 servings.
Schema/Recipe SEO Data Markup by ZipList Recipe Plugin
http://andloveittoo.com/maple-glazed-roasted-fennel-with-apples-and-root-vegetables/


Don’t forget link your favorite fennel recipe below, then stop by and visit Shea over at Dixie Chik Cooks and see what she has for you.


Good luck, everyone!

Heathy Luncbox treat- Yellow Squash Vanilla Cupcakes. Ingredient-Challenge Monday

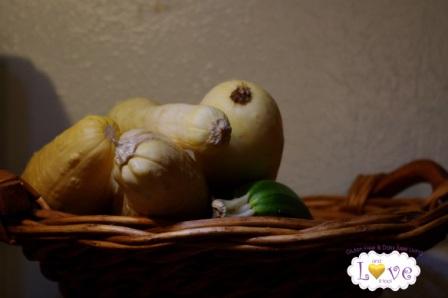
This Ingredient-Challenge Monday, Shea and I have selected the beautiful Yellow Summer
Squash
as our
challenge ingredient of choice.

This versatile vegetable is far more than an ingredient for
ratatouille,
vegetable casseroles or just one more thing to fry…

Yellow squash is rich in antioxidants, low in calories, mild
in flavor and beautiful in color.  Why
wouldn’t you want to devour this fantastic vegetable on a regular basis?

After Shea and I pin pointed this fantastic ingredient for
this week’s challenge, a friend posted this recipe
for Summer Squash Cupcakes and I knew I needed to find a way to make this
recipe my own.  Squeezing vegetables into
your desserts (like these zucchini brownies),
is one of my favorite ways to increase the nutritional value of many
mouth-watering desserts, and is also a way to ensure my children are getting
their vegetables in ways that they will enjoy.

These Yellow Squash Cupcakes are a perfect addition to my
Healthy Lunchbox Series.

So far, I opened this series with tip #1: Use Planned-Over’s

This was followed by a lovely post from a dear friend of
mine, who offers the suggestion through tip #2: When you can, make it from
scratch
.

And most recently, Stacy from Paleo Parents
shared her beautiful guest post
and tip #3: Fun meals + Fun containers = Happy Kids. (There is so much more to
this lively post, if you haven’t visited, please do so now!).

With this, I offer you a way to help even your food
sensitive children become the king of the cool (and healthy) lunchbox; tip #4:
Give them something that even their friends will drool over!

These high-protein cupcakes are the ideal balance of flavor
and nutrition.  Top them with your favorite
nut
or sun butter;
this is a treat your kids will ask for time and time again.


Yellow Squash Vanilla Cupcakes

Ingredients

  • ½ c Coconut Flour
  • ½ tsp Baking Soda
  • ¼ tsp Sea Salt
  • 4 Eggs
  • ½ c Coconut Oil
  • ½ c Agave Nectar
  • 1 Tbs Vanilla Extract
  • 1 c Firmly Packed, Shredded Yellow Squash (about 1
  • med-small)

Instructions

  1. Preheat oven to 350f.
  2. Prepare muffin tin by greasing or lining each tin, set aside.
  3. In large mixing bowl, blend together coconut flour, baking
  4. soda and sea salt. In medium mixing
  5. bowl, whisk together eggs, coconut oil, agave nectar and vanilla extract. Slowly mix together wet ingredients into dry
  6. bowl. Fold in shredded yellow squash.
  7. Scoop approximately ¼ cup dough into each muffin tin. Bake for 20-25 minutes or until a toothpick,
  8. when inserted in the center of each cupcake, comes out dry.
  9. Serve as-is or topped with your favorite nut or sunbutter.
  10. Makes 12 cupcakes.
Schema/Recipe SEO Data Markup by ZipList Recipe Plugin
http://andloveittoo.com/heathy-luncbox-treat-yellow-squash-vanilla-cupcakes-ingredient-challenge-monday/


Don’t forget to visit my original Healthy Lunchbox post and
enter to win The Gluten-Free Asian Kitchen,
which has quickly become a favorite reference in my home!

Also…Jules Gluten-Free is offering her Back to School with
Jules e-book
for FREE
until August 26! Simply enter code 2011BTSebook (case sensitive) at check out
and hit apply.  The value of the item
will drop to $0.00.  Don’t miss out on
this essential addition to your healthy lunchbox lifestyle!

(Thank you, Shirley-GFE for
the info on Jules book!! xoxo)

There are many more Healthy Lunchbox Guest-Posts on their
way. Keep your eyes open for more amazing posts all month long!

Enjoy your week!

Vegan Avocado Pistachio Pudding, Ingredient-Challenge Monday Recipe

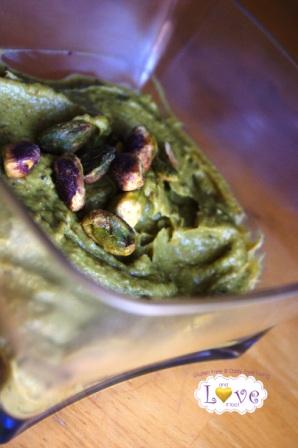
I spent this past week several hours away from home in work related training; away from my children, husband, phone and computer.  On Wednesday, in a panic, I realized we were approaching a challenge week and hadn’t even picked an ingredient!

Thankfully, I was able to reach my Ingredient-Challenge Monday partner, Shea who had something in mind and was able to take the reins from there.

This week we are featuring the beautiful avocado.
Far beyond guacamole, avocado is a deliciously creamy addition to most any recipe and I am thrilled to introduce my creation to you this evening.

What makes the avocado so wonderful?

While you may know that this fruit is filled with healthy monounsaturated and polyunsaturated fats, did you know that it is a great source of Omega-6 fatty acids?  Avocados are also rich in Vitamin C, E, K as well as b-vitamins including Folate and Pantothenic Acid.

Pantothenic Acid? Why on earth would I stop and tell you about that?  Well…pantothenic acid is an essential nutrient that helps to synthesize and metabolize proteins, carbohydrates and fats…so while the avocado may be rich in fat, these are not only good fats, they are also full of nutrients that will help you to metabolize those fats more efficiently.

Couldn’t we all use a little more of that?

There are so many wonderful nutrients packed into this green goddess that I could go on and on.  In the meantime, you can read more about the nutritional value of the avocado here.

Having grown up in Sunny Southern California, avocado has long been a staple in my diet. Even so, it was not until the need to find dairy-free alternatives to meet the needs of my child, and now myself, came into play that I truly began to appreciate the versatility of this wonderful ingredient.

Most recently, while watching an early episode of 24 Hour Restaurant Battle, I became intrigued with a dessert featured on the episode.  Up until this time, avocado pudding remained foreign to me.

Sure, I have used avocado in ice cream, but for some reason the thought to include this creamy item in my pudding recipes never crossed my mind.

When Shea offered this ingredient up as the challenge-ingredient for the week, I wracked my brain to discern how I could go about creating a pudding masterpiece truly worthy of Ingredient-Challenge Monday.

Because I have already answered a previous challenge by making a mint-chocolate mousse, I wanted to steer clear of chocolate this go-round (strange, I know).

Vanilla pudding seemed out of the question, as the green hue of the avocado would surely keep my family from enjoying this (no matter how delicious it tasted)…

After much contemplation, it seemed pistachio pudding offered the greatest solution for me this week.

Pistachio pudding is supposed to be green, smooth and creamy, just like the avocado.  Pistachio pudding is supposed to have a subtle balance between sweet and salty, flavors that compliment avocado beautifully. Pistachio pudding, frankly, just sounded good. So, I decided to make pistachio pudding!

This pudding is truly the pistachio lover’s dream.  Everything you remember about pistachio pudding with none of the dairy, grains or sugar to ruin it.

I hope you find as much enjoyment in this simply delicious recipe as we have.

Vegan Avocado Pistachio Pudding

1 c Shelled Salted Pistachio Nuts, soaked 3 hours

1/3 c Agave Nectar

2 Whole Ripe Avocado, seeds and skin removed

1 Tbs Vanilla Extract

1 tsp Lemon Juice


Drain and rinse pistachio nuts. In high-speed blender, combine soaked pistachio nuts and agave nectar.  Blend on high until smooth paste has formed.  Add remaining ingredients and continue to blend, first on low speed, working your way up to high until smooth pudding has formed.

Serve in 4 small bowls, topping with salted pistachios for garnish.


Now that you have taken a moment to devour my offering, be sure to visit Ingredient-Challenge Monday to see what our featured blogger, Shea, has created this week.

Don’t forget to link in your favorite avocado recipe and join in on the blog hop below!

Happy Monday everyone!


Ingredient-Challenge Recipe: Gazpacho

Gazpacho is a soup best served cold. In this nation-wide heat wave, this soup is a welcome change from the norm.

When Shea and I agreed to use bell peppers as this week’s challenge ingredient, there were a number of recipes that came to mind. And while I hope to share my favorite grain-free stuffed bell peppers or roasted red pepper recipe down the road, it simply has been too hot to even contemplate turning my oven on for any period of time.

Filled with vibrant garden vegetables, rich with nutrients and flavor, this soup is delicious as an appetizer, side or even as a refreshing main-course.

This recipe makes a lot of soup, as many as 10 generous servings. Feel free to cut the recipe in half, store in air-tight containers for a future meal, or even freeze for an easy dish that you can enjoy any time of the year.

May you find many reasons to relax, refresh and rejuvenate all summer long. Enjoy!

Gazpacho

4 lbs Vine-Ripened Tomatoes, diced

3 Bell Peppers (Red, Yellow or Orange), diced

1 Medium Onion, diced

2 Medium-Large Cucumbers, peel removed, seeded then diced

4 Large Garlic Cloves, minced

1/3 c Red Wine Vinegar

2 Tbs Olive Oil

2 Tbs Italian Seasoning

Salt and Pepper to taste

Crushed Red Pepper, optional

1-Medium Yellow Bell Pepper, diced, for garnish

After preparing and dicing each ingredient, mix all but the salt and pepper in large serving bowl. Processing approximately 1/3 mix at a time, blend ingredients together on highest setting until completely smooth. Pour each batch into large serving bowl, combining thoroughly. Salt and pepper to taste, add crushed red pepper if desired. Chill at least 3 hours, ideally overnight. Thin soup with ice-cold water, if needed. Serve and garnish with yellow pepper, if desired.

Makes 10 servings.

Now that you see how I chose to use our feature ingredient, be sure to visit Shea over at Dixie Chik Cooks for more great ways to use your bell peppers.

Don’t forget to link your favorite bell pepper recipe, below. Link will be open until August 7, and our next Ingredient-Challenge Monday is set for August 8. Check back on August 5 for our next challenge-ingredient announcement!

Cucumber, Mint and Watermelon Salad

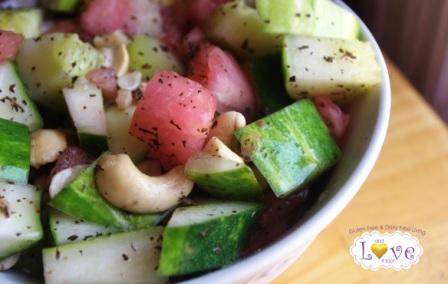
I love cucumbers,which is good since (as mentioned before) , my garden is overflowing with them this year. 

When Food Network presented cucumbers as the next ingredient for their Summer Fest, I was elated to have another opportunity to share one of my family’s favorite ways to eat this delectable vegetable with you. 

This Cucumber, Mint and Watermelon Salad is a pleasant side dish or snack, and is the perfect complement to any summer picnic. Extremely refreshing, this salad is truly one of our favorite dishes and has provided the perfect pick-me-up for these hot summer days.  May you find as much enjoyment in this salad as we have.

Cucumber, Mint and Watermelon Salad

2 Med-Large Cucumbers, cubed

4 c Watermelon (1 small or ½ medium), cubed

Juice from 1 lemon

1 Tbs Palm Sugar

1 Tbs Crushed Mint

1 c Raw Cashews


In large serving bowl, mix together cucumbers and watermelon. Set aside.  In small mixing bowl, whisk together lemon juice, palm sugar and crushed mint, until palm sugar is completely incorporated.  Pour lemon-mint dressing over cucumbers and watermelon, refrigerate until ready to serve. 

Immediately prior to serving, toss in raw cashews.  Serve cold.

Makes approximately 6-8 servings. 

Enjoy!


Be sure to visit all of the other Summer Fest recipes.  With so many ways to enjoy this magical vegetable, how can you resist?

Pinch My Salt: Chilled Cucumber, Kefir and Avocado Soup

What’s Gaby Cooking: Cucumber-Basil Gimlet

In Jennie’s Kitchen: Radish-Cucumber Crostini

Big Girl Small Kitchen: Spicy Cucumber Salad with Shallot, Ginger and Mint

Grecian Kitchen: Summer Cucumber Salad

Napa Farmhouse 1885: Cucumbers Coolers with Agave Simple Syrup

Cooking With My Kid: Cucumber Limeade

FN Dish: Summer Fest: Cucumber Recipes

CIA Dropout: Relishing Cucumbers

Healthy Eats: Cool Cucumber Soup

Food for 7 Stages of Life: Cucumber Cherry Salsa

Cooking With Elise: Green Tea Cucumber Pops

Glory Foods: Cucumber and Shrimp Boat

Virtually Vegan Mama: Fire-Roasted Tomato and Cucumber Gazpacho

Food2: When Life Gives You Cucumbers, Make a Cucumber Cocktail

Cooking Channel: Cucumbers Stuffed with Crab-Mango Salad

Recipe Girl: Bread and Butter Pickles

Taste With the Eyes: Spicy Pickled Cucumbers with Wakame and Garlic Blossoms

Virtually Homemade: Cold Thai Cucumber-Mint Soup

Add a Pinch: Cucumber Tea Sandwiches

The Cultural Dish: Ahi Tuna with Cucumber Sauce and Salad

Daily*Dishin: Cool n’ Zesty Cukes: 7 Minute Summer in a Jar

Daydreamer Desserts: Cubanita Margarita

Purple Cook: Cucumber Gazpacho with Indian Flavored Shrimp Relish

Indian Simmer: Cucumber at its Best with Chaat Masala

Big Apple Nosh: Quick and Easy Homemade Pickles

Sweet Life Bake: Agua de Pepino

The Sensitive Epicure: Tzatziki with Grilled Gluten-Free Pitas and Fresh Cucumbers and Peppers

Zaika Zabardast: Cucumber Gazpacho

A Way to Garden: Cucumber-Growing Q&A and the Best Pickles

Cooking with Books: Summer Fest: Cucumbers

This recipe has also been added to: Ingredient Challenge Monday, Cucumbers

Organic Bread and Butter Pickles (Grain-Free, Refined Sugar-Free, Vegan), Ingredient Challenge Monday

Summertime is a time filled with happy memories of childhood.  Family reunions out on the lake.  Working with grandpa in the garden.

It was in the making of these memories that I learned to love home-grown fruits and vegetables. To favor small batch canning; and to know that with a little time and a lot of love, you can easily provide deliciously healthy concoctions to your family for a fraction of the price.

My great-grandmother made the best plum jelly.  I scarcely pass by a tree loaded down with these perfectly purple gems where I do not think of her.

My grandpa made the best pickled okra and chowchow I’ve ever had.

My dear aunt Teena…her specialty was bread and butter pickles.  Well, having been honored to have her in my home for a period of time before her passing, I can tell you that she had many specialties.  She was a darn good cook.  But for whatever reason, bread and butter pickles stand out as one of the most memorable things she ever made me.

Tonight, I would like to round out this holiday weekend by honoring her memory while I share with you my version of bread and butter pickles.

Inspired by classic bread and butter recipes, but made with organic ingredients, palm sugar instead of the traditional white fluff; organic raw apple cider, and cucumbers fresh from the garden.

I understand that not everyone has the patience, ability or space to grow their own garden. Fortunately, cucumbers are affordable and typically available this time of the year at your local farmer’s market or through your local CSA.

Varieties like bush pickle, salad bush and spacemaker are great for container gardens. Because these varieties naturally grow smaller cucumbers, they also make ideal cucumbers for pickling.

Traditional picklers include A&C Picking, Parisian, Little Leaf and Parigno Cornichon varieties.  Pickling cucumbers grow with tiny spikes and spines which can easily be removed during the cleaning process.

If you do need to purchase these through your local grocery store, make sure you take the time to scrub off any wax that may be present on the peel.  Meant to help preserve the cucumber and increase shelf time, this wax can trap dangerous chemicals onto the peel, will cloud the preserving liquid and will turn your pickles brown.

Additionally, be sure to cut off each end and discard before slicing the remainder of the vegetable.  The stem end is great for eating, but seems to be a thicker texture, not ideal for the pickling process. The flower end contains enzymes that can soften your batch and cause your pickles to turn brown.  Nobody wants soft, brown pickles.

Without further adieu, I present you with my recipe for bread and butter pickles and wish you the most joyous of memories this beautiful season.

Organic Bread and Butter Pickles (Grain-Free, Refined Sugar-Free)

3lbs Sliced and Trimmed Pickling Cucumbers

4 medium Yellow Onions, sliced thin

½ c Pickling Salt

3 cups Organic Apple Cider Vinegar (5% acidity)

2 c Palm Sugar

2 Tbs Mustard Seeds

1 tsp Celery Seeds

1 tsp Ground Tumeric

5 Pint (16 oz) Glass Preserving Jars with Lids and Bands

I also recommend this 5-piece canning set.


In large bowl, combine sliced cucumbers, onions and salt.  Cover in cold water and allow to stand at room temperature for 2 hours.  Drain and rinse with cold running water until drained through.

Prepare boiling water canner (a large stockpot…one large enough to fry a turkey in…works well, too).  Heat jars and lids in simmering, not boiling water, until ready to use.  I repeat, do not boil jars and lids. This is because boiling runs the risk of melting (not just softening) the bands needed to seal the lids to the jars. Watch your water, you will be fine.

In large saucepan, combine vinegar, palm sugar, mustard seeds, celery seeds and turmeric. Bring to boil, dissolve sugar and then stir in vegetables.  Return mixture to boil, cook for approximately 5 minutes, or until cucumbers are slightly tender.

Remove jars from simmering water, 1 at a time, packing each with hot vegetables as you go (leave liquid).  Use headspace tool to ensure ½ inch headspace.

Once all jars are filled with hot vegetables, ladle in hot pickling liquid over vegetables, making sure to leave ½ inch headspace.

Wipe each rim clean.

Removing hot lids from simmering water, center each on respective jar.  Apply metal band until it is fingertip tight.

Bring water to boil, adding more if needed to ensure enough height to cover the jars while in upright standing position.

Process jars in boiling water for 10 minutes, adjusting as needed for altitude.

Remove jars and cool.

Check lids after 24 hours.  Lid should not flex up and down when center is pressed.

If lid is not securely sealed, immediately move the jar to the refrigerator and enjoy pickles within 14 days.

If lid is secure, for ideal flavor, allow pickles to stand for 4 to 6 weeks.  Store in temperature controlled room for up to 6 months.


Now that you have my version of the classic bread and butter pickles, be sure to visit Ingredient Challenge Monday to see what amazing recipe Shea has created for this month’s challenge, and do not forget to link up your own cucumber creation!

Have a great week!

xo,

SunnyB

This post is also linked to: Slightly Indulgent Tuesdays, Friday Foodie Fix


Zucchini Lasagna (GF/CF, Grain-Free, Soy-Free, Vegan Option Noted)

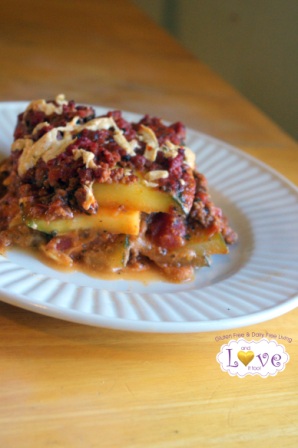
I am blessed.  Truly, completely blessed. 

My home is filled with amazing children who make me laugh and fill my world with reasons to celebrate every day. 

I have a husband who works hard for us and would do anything he could to give his family all they need.

In my home, I also have have a mother-in-law who helps me keep my head level at times, drives me crazy in others; but who loves me very much and would not trade me for the world (and sometimes, she even tells me so!). 

I have three dogs.  

One who is a devoted protector and surrogate child to my MIL.  He is loving and kind with the sweetest teddy bear eyes you have ever seen. 

One who officially belongs to my eldest daughter, but spends more time with me and is a constant reminder that I need to take time to slow down and pet the dog (forget smelling the flowers ;) ).  She also has the keen ability to know exactly how to drive me insane…so much so, that she earned her own spot in my blog last year, discussing exactly how batty she can drive me. Even so, I really do love her.

Our third dog is the newest addition to our family.  He found us.  Having sought his original owners, doing all we could to have his pictures posted throughout town, getting him scanned more than once or a chip (since he has no tags), praying his family would find us yet receiving no response for our efforts…well, we have accepted that he is likely to be with us for good.  I believe this one will truly be mine.  He follows me most everywhere. He is silly and sweet, playful and loving, and he makes me smile.

:) Enough about my dogs…

Of all the blessings in my life, one of the most bountiful can be found in our backyard.  My little garden takes up just a small percentage of our fenced in property, yet provides for us in abundance.  When you have 8 people in your home, being able to grab fresh produce from your own yard means more than I can express. 

I understand that not everybody has the same opportunity. 

When I lived in apartments or condominiums though, I always managed to have some sort of potted garden growing on our patio. Marci Gilbert posted a few beautiful photographs of her own potted garden today. Tomatoes, bell peppers, fresh herbs…there are endless possibilities when you decide to take your produce into your own hands, no matter where you live! 

If you are not up to growing your own, check in with your local Community Supported Agriculture (CSA). CSA’s offer locally grown, organic fruits and vegetables for a fraction of the cost you would pay at your local grocery store.  A great way to support local farming, CSA’s also offer the opportunity for you to try something new, something healthy and to really feel great about what you are feeding your body.

There are ways to bring organic goodness to your home, no matter where you live.

Tonight, I would love to share with you a recipe inspired by the gigantic zucchini we have harvested from my garden.

Any gardener who has grown zucchini of their own will tell you several things about these big, beautiful plants.  #1. They are really easy to grow.  #2. Don’t let the baby zucchini fool you, turn around for two seconds and you will have a monster zucchini on your hands (which is how we ended up with the monster zucchini pictured above).  #3. Eat the blossoms.  They are good for you, they taste really great in your salad, stuffed with Italian seasoned almond ricotta cheeze, or simply battered and fried.  Plus, if you find you have more zucchini than what you know to do with (which happens very quickly, I might add), this is a great way to naturally cut back on your production while benefiting your family with a wealth of flavor and nutrition.

Recently, on my other blog site, we placed a challenge to post your best zucchini recipe.  Admittedly, I use this vegetable in almost everything; but one of my favorite ways to use zucchini is as a fiber rich, nutrient dense and as low calorie replacement for pasta. 

With only 20 calories per cup and the ability to soak in the layers of flavors that accompany this dish, zucchini provides the greatest grain-free medium I know to make this lasagna over-the-top delicious.

This dish makes a lot of lasagna.  My family of 8 was able to enjoy seconds for dinner and still have some leftover for lunch the next day.  While I am going to give you the ingredient list I used in full, you may want to attempt to half this recipe for your own use.  I have not made it any other way, so I cannot promise results or cooking time…just know that even if you do have lots of leftovers, this is one lasagna you won’t feel guilty enjoying day after day.

Zucchini Lasagna

2lb lean ground meat (I like ½ 97/3 turkey and ½ 97 beef)*

2 Tbs Dried Basil

2 Tbs Minced Garlic

5lb Zucchini, washed and sliced very thin, lengthwise

2-32 oz Jars of Marinara Sauce

2 c Water

1 batch Italian Seasoned Almond Ricotta Cheeze

8 oz Cheddar Daiya Cheese

8 oz Pepperjack Daiya Cheese

Heat oven to 350f.  In large fry pan, cook lean ground meat with basil and garlic until cooked thru.  Add marinara sauce.  In each jar of marinara sauce, add 1 c water, shaking jar to obtain any lingering sauce and then add liquid to the meat sauce mixture. This added water will help tenderize the zucchini. 

In the bottom of a 15x11x4 inch lasagna pan, pour a thin layer of meat sauce (about 1/3 the total sauce) and spread over the base of the pan to ensure even coverage.  Over this, layer zucchini evenly, as you would lasagna noodles.


Then layer almond ricotta cheeze.


Then more zucchini, then 1/3 meat sauce, cheddar daiya cheese, zucchini, topping with the remainder of the meat sauce, saving the remaining daiya cheese for the final 10 minutes bake time.

Bake at 350 for 55-60 minutes, or until zucchini has become tender.  Add pepper jack daiya cheese (mozzarella would work well here, my supplier was out when I last placed my order and the jack cheese has an incredible flavor that simply added a whole new level to this dish).  Bake for 10 more minutes, or until cheese has begun to melt.

Serve warm.

Makes approximately 18 servings

*For a vegan option, simply omit ground meat and add 2 more 32 ounce containers of marinara sauce…make sure you have enough sauce to cover each layer as needed.

While you are working diligently on this wonderfully healthy dinner option, please do not forget to check in with our Ingredient Challenge Monday bakesale to benefit natural disaster victims.

100% of the winning donation goes towards the American Red Cross and their relief efforts, world-wide.

You will find several naturally gluten free options at this bakesale, including two which will be hand made especially for you-by me.

Additionally, if you have a brilliant blueberry recipe, now is the time to share!  You have until Sunday to link up to this challenge…do not let it pass you by! Get your linky tool, and stop to see all the brilliant blueberry recipes received so far, here. 

Finally…before I go…I am excited to announce the next challenge-ingredient!!

Cucumbers!

Speaking about gardens…did you know that cucumbers are one of the easiest things to grow?  Knowing that they are related to squash, zucchini and watermelon (which are all very easy to grow), it makes a lot of sense that these crisp vegetables would multiply the way they do. 

Listed as one of the World’s Healthiest Foods, one cup of cucumbers will cost you just 13 calories yet are rich in fiber, vitamin c, silica, potassium and magnesium. 

Silica is an essential component of healthy connective tissue, including muscles, tendons, ligaments and bone. Silica can help to improve the complexion and health of the skin, and help reduce swelling…which is why expensive spa treatments often include slices of cucumber over each eye!  What a great way to reduce swelling under the eyes!

Use cucumbers for swollen eyes; find relief for your sunburn and as a way to decrease the swelling/irritation from dermatitis. 

Check back on Monday to see what Shea and I  have done with our cucumbers, and be sure to link in your favorite recipe that day as well! 

We look forward to hearing from all of you and wish you a happy Independence Day weekend!

xo,

SunnyB

Italian Seasoned Almond Ricotta Cheeze (Vegan)

Several months ago, I posted a very flavorful recipe for Seasoned Almond Ricotta Cheeze which was inspired by Heidi from Adventures of a Gluten-Free Mom and Carrie from Ginger Lemon Girl.  This cheeze is still a favorite in my household, although I have taken time to tweak and refine this recipe to match a number of foods we enjoy.

Tonight, I would like to share with you my most recent revision to this recipe as it will be an essential part of a recipe I will be sharing with you tomorrow.

You may note the lack of hummus in this recipe.  While I love hummus, since working with my first almond cheeze recipe, I have found that it is not necessary to make a successful nut cheeze.  You may also note that my first recipe requires almond peels to be removed.  I have found that after 12-18 hours soaking, the almonds blend just as well with the peels on as they do with the peels off. Since keeping them on retains more fiber and nutrients…I now recommend keeping them on! 

This recipe is completely grain free, legume free, paleo friendly and flat-out delicious.

So good it can be eaten by itself, I look forward to your feedback as you share this fabulous recipe with everyone you know.

Italian Seasoned Almond Ricotta Cheeze

3 c Raw Almonds, soaked 12-18 hours, peels in tact

3 c Water

3 Tbs Lemon Juice

2 Tbs Olive Oil

2 Tbs Dried Basil

1 Tbs Minced Garlic

2 Tsp Salt

Thoroughly drain and rinse almonds in cold water, put into blender.  Add remaining ingredients and blend on the highest setting until very smooth, approximately 4-6 minutes.

Using a cotton cloth which has been drawn taught over a large mixing bowl with a rubber band; slowly pour almond mixture into the cloth and close with a drawstring or another rubber band.  Allow cheeze to drain for 6 hours on the counter and another 6-18 hours in the refrigerator.

When cheeze is ready, transfer to an airtight container. Serve with fresh vegetables, use in your favorite ricotta dishes, save it for the recipe which I will be sharing with you shortly.

Before I run off…I want to remind you about a very important event happening through Ingredient Challenge Monday.  Our Online Bakesale to benefit Natural Disaster Victims is on now! 

Per American Red Cross guidelines, we are working with MissionFish and eBay to ensure all funds are managed to their benefit. 

Click on the link below to be taken directly to the items listed by seller ID: ICMondays

100% of the winning bids will go to benefit Natural Disaster Victims through The American Red Cross. Bidding ends 7/3, don’t miss your chance! 

Hurry and place your bid today! xoxo

Good luck and happy bidding!

Related Posts Plugin for WordPress, Blogger...