If you have not been to see Cindy Gordon’s blog, Vegetarian Mamma, you are missing out! Her e-book, Gluten-Free Fork is a delightful compilation of 40 easy to make gluten-free and allergy friendly recipes. Keep your eyes open for a giveaway later in the Healthy Lunchbox series which will include Cindy’s book! Thank you for joining us today […]
Healthy Lunchbox 2014: Kylie from The Gluten and Dairy Free Bakehouse
August 31, 2014 By 2 Comments
I learned a long time ago that even the healthiest lunchboxes need a treat every now and then. Kylie from The Gluten and Dairy Free Bakehouse agrees! Bringing us delicious, gluten and dairy-free options all the way from Australia, Kylie is not only focused on making these delicious treats allergy-friendly, she is doing it all in […]
Healthy Lunchbox 2014: Trish from Kinda Real Gluten Free Food
August 30, 2014 By 1 Comment
When Trish from Kinda Real Gluten Free Food came to me with her post, she knew it was a little different than what we normally share here on the Healthy Lunchbox series. Even so, she covers a very vital topic of understanding the rules and regulations your schools must follow in regard to dealing with allergies […]
Healthy Lunchbox 2014: Brianna Hobbs from Flippin’ Delicious
August 29, 2014 By 4 Comments
Today on Healthy Lunchbox 2014, Brianna from Flippin’ Delicious is sharing a easy to make, easy to carry meal her daughter loves! While she doesn’t have anyone in her home who is school aged just yet, here she shows how easy (and how important) Healthy Lunchboxes are for children of all ages! Enjoy! _______________________________________________________________________________________ Hi! I’m […]
Healthy Lunchbox 2014: Tia from Tia’s Kitchen
August 28, 2014 By 5 Comments
Beyond the fact that the Healthy Lunchbox series has brought dozens of bloggers together over three years time to join forces and bring to you their best ideas and most cherished lunchbox recipes, I appreciate the fact that this series continues to introduce me to new bloggers and like-minded mommies. Today’s post comes from the lovely Tia over at […]
A few beginning of the school year thoughts…
August 27, 2014 By 9 Comments

Sometimes it seems life just doesn’t want you to get ahead. My family has been overwhelmed with blessings. We really have. But just when everything seems like it is flowing well, inevitably something throws us for a loop. Last year, these ‘loops’ caused me to take an unexpected break. This year, simply because of the […]
Healthy Lunchbox 2014: Phoebe from Feed me Phoebe
August 21, 2014 By 2 Comments
Phoebe from Feed me Phoebe and I have had the opportunity to work together in varying capacities from blogging with the Food Network to her fantastic Israeli Chickpea Salad shared in the 2012 Healthy Lunchbox series. From cooking classes to being able to hire Phoebe as your own personal chef, should you ever have the chance…this is a […]
Healthy Lunchbox 2014: Susan from Real Kids Eat Spinach
August 18, 2014 By 1 Comment
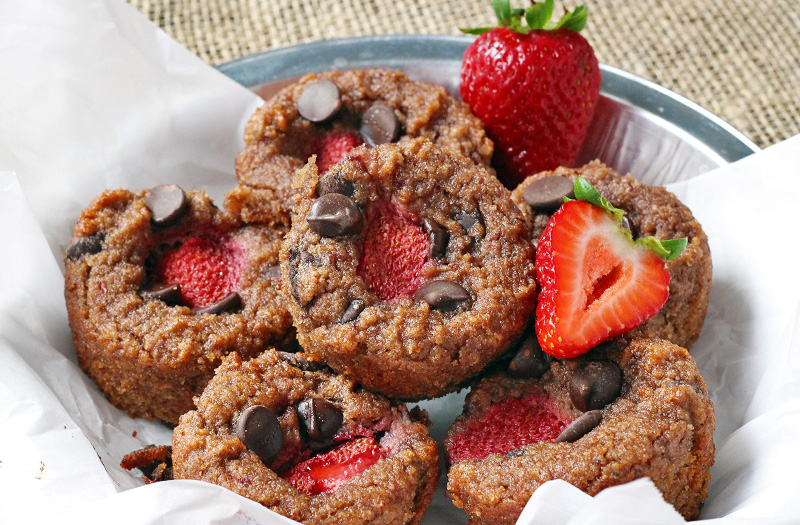
Susan from Real Kids Eat Spinach has been participating in the Healthy Lunchbox Series since it began, back in 2011. I am thrilled to be working with her once again. Susan is always filled with great advice and delicious recipes, and her Paleo Zucchini-Banana Bread looks to be no exception. Enjoy! ____________________________________________________________________________________________________ My kids “get” it when […]
Healthy Lunchbox 2014: Kim from Thriving Gluten-Free
August 17, 2014 By 3 Comments

Kim from Thriving Gluten-Free is a certified health coach who specializes in gluten-free living. Today she is not only sharing her special story and many, many tips to keep your child’s lunch allergy friendly and kid friendly at the same time, she has also given us 3 recipes to add to our repertoire! This is […]
Healthy Lunchbox 2014: Janet from The Taste Space
August 16, 2014 By 2 Comments
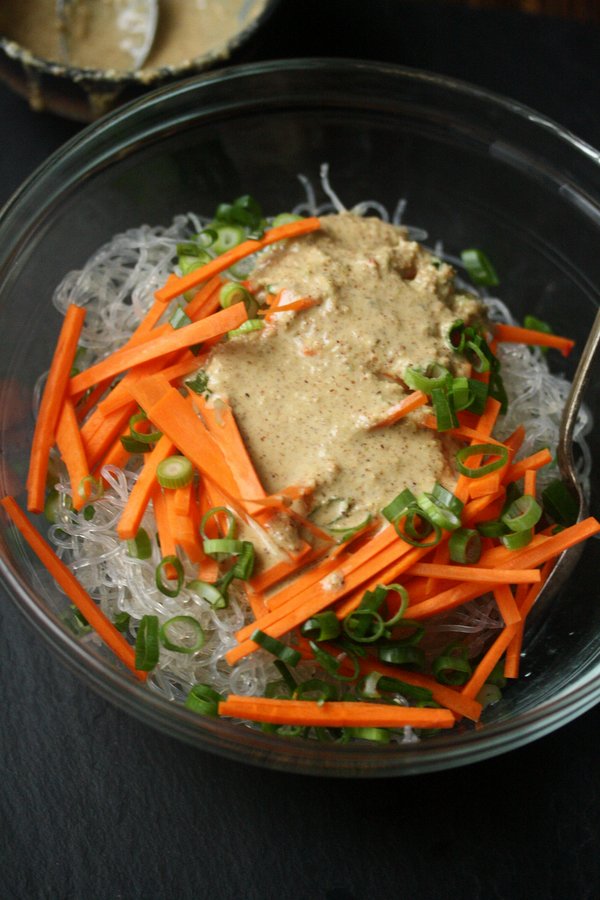
Last year, Janet from The Taste Space shared with us a luscious Salad in a Jar. Her Topaz Dragon Ginger Dressing is one of my all-time favorite salad dressing solutions. As an opening recipe to this year’s Healthy Lunchbox series, this Quinoa Protein Bowl is an excellent choice for those who is meat-free or simply enjoys an […]


