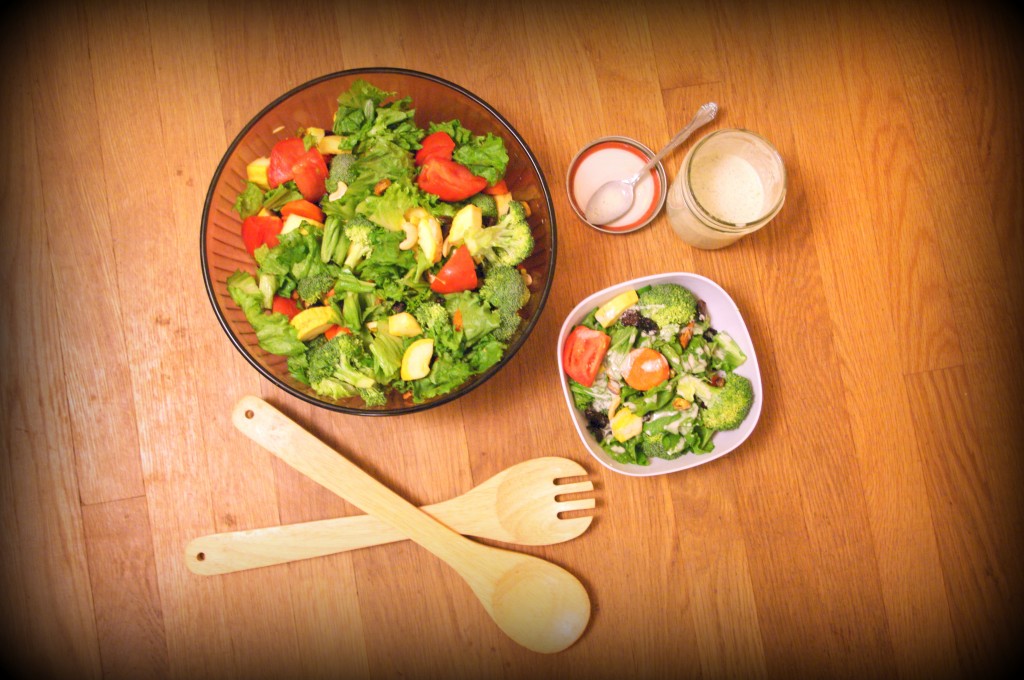
One day, my husband looked at me lovingly and said those five little words many of us never expect to hear: “Honey, I miss your salad.” Yes, my salad. I guess it had been a few weeks since I had made one of my nutrient-packed salads and my husband had a craving. Now if only […]
Ingredient-Challenge Monday: Pumpkin Spice Steamer (Dairy-Free, Refined Sugar-Free)
October 8, 2012 By 13 Comments
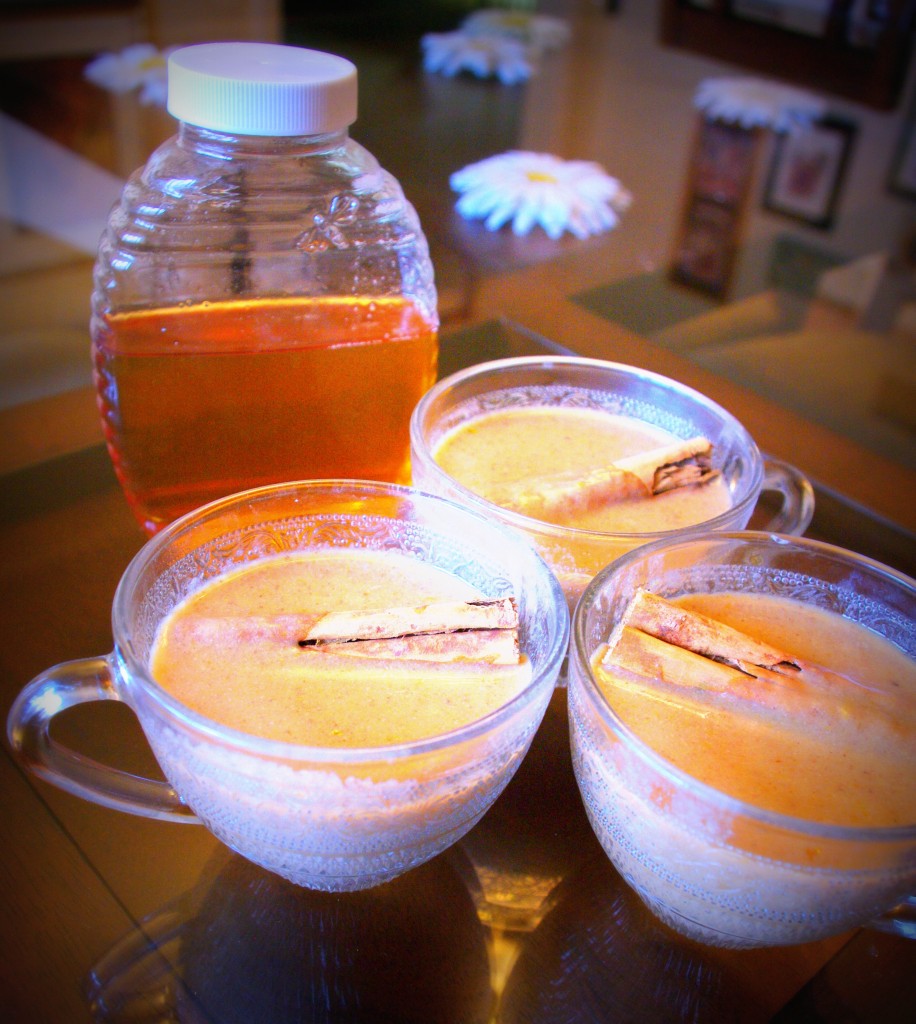
With cold mornings and a plentiful squash harvest, my mouth has been watering at the thought of pumpkin bread, pumpkin pies and more; but sometimes I just want something warm and sweet that will satisfy my pumpkin craving without taking a lot of time. This Pumpkin Spice Steamer is a delicious solution to those sugar-laden […]
Grain-Free Spinach Pie
October 3, 2012 By 5 Comments
I have mentioned previously about my visit to the Dallas Gluten & Allergen Free Expo in early September and how I had the opportunity to meet some amazing people and learn about some fantastic products. Among all of the new and exciting items, there were some familiar brands and some familiar faces along with them. One individual […]
September 13, Blogiversary and Upside Down Pineapple Cake (grain-free, dairy-free, refined sugar-free, paleo)
September 13, 2012 By 18 Comments
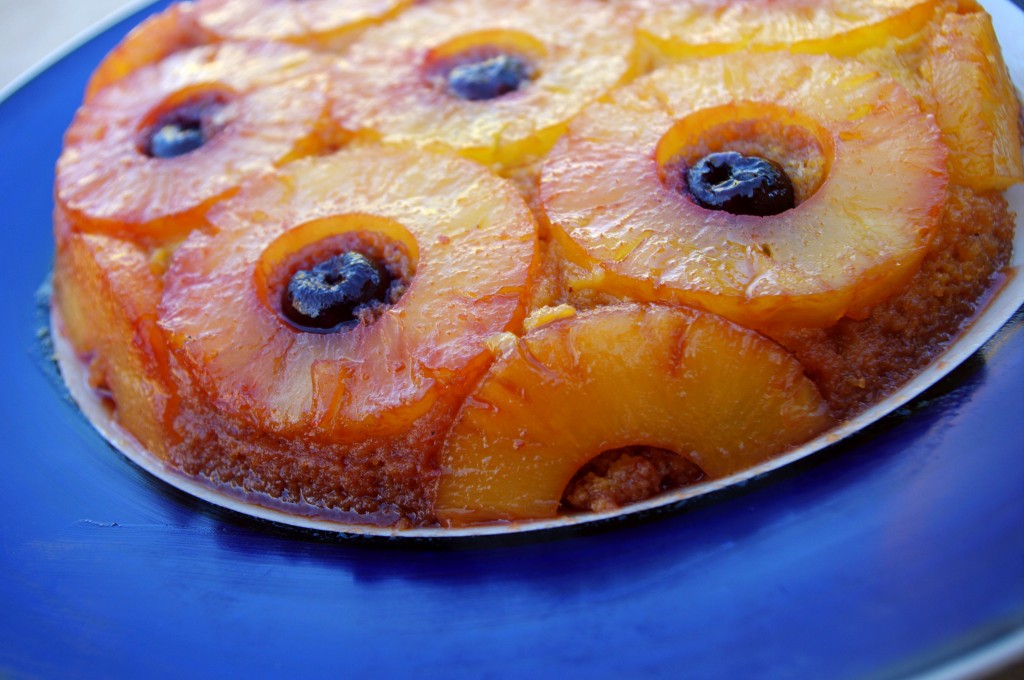
September 13th may not mean a lot to most, but to the many who have been diagnosed with celiac disease, September 13th is a day just as important as most any other holiday. You see, September 13th has been designated as National Celiac Awareness Day by the United States Senate, and “whereas the majority of […]
Healthy Lunchbox 2012: Peachy Coconut Streusel Muffins
August 15, 2012 By 14 Comments
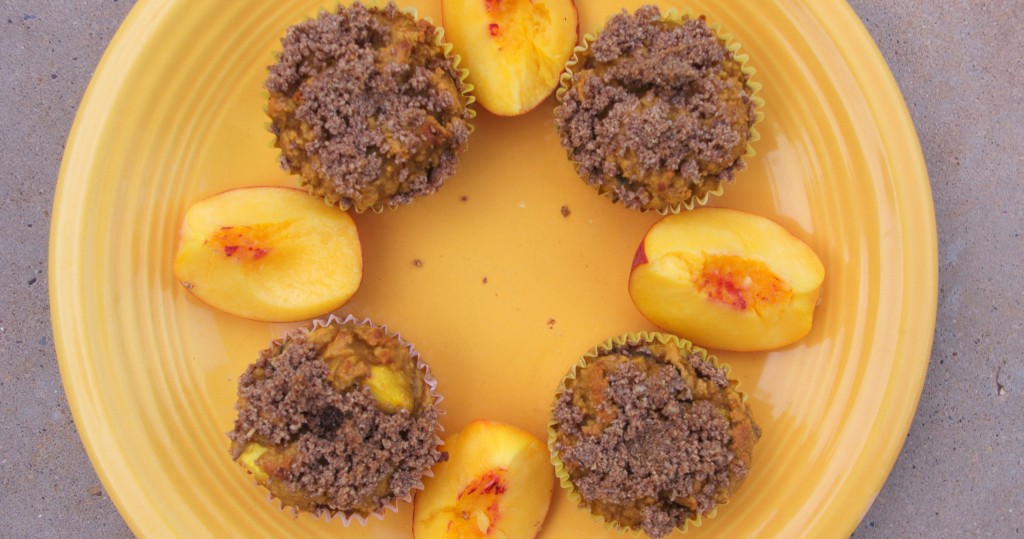
When most people think of muffins, they think high-carb, grain-filled, low-nutritional value item. The last thing I want to feed my children is anything that meets that type of description. The great thing about grain-free cooking is that a majority of flours (nut, seed and coconut) are naturally high in fabulous fiber, protein and nutrients. […]
Healthy Lunchbox 2012
August 10, 2012 By 5 Comments
Welcome to Healthy Lunchbox 2012! One year ago, I had an idea… Every year the struggle to fill my children’s lunchboxes with healthy foods they will enjoy seems to become a little more complicated. To keep things interesting, I asked some of my favorite bloggers for some help. Thus, the Healthy Lunchbox Series was born. […]
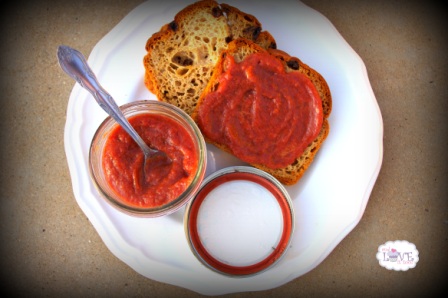
Roasted Garlic, Basil and Tomato Paleo Tart
August 1, 2012 By 21 Comments
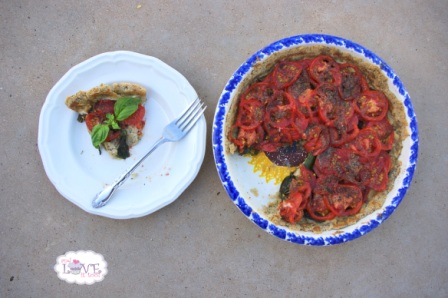
This week on FoodNetwork Summer Fest, food and garden bloggers are joining up to share their favorite tomato recipes. I don’t know about the other Summer Fest bloggers, but for me this was no easy task. You see, tomatoes are a staple in our home. Quartered tomatoes are the perfect side with our morning breakfast. […]
Growing Up Isn’t So Bad, Peter Pan Squash Spiced Oven Fries
July 25, 2012 By 26 Comments
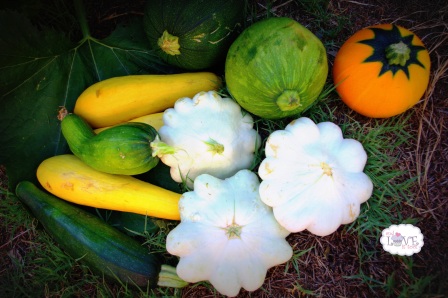
Today on FoodNetwork Summer Fest, food and garden bloggers are joining up to highlight the vibrant staple: Summer Squash. Oddly enough, the title “Summer Squash” has less to do with the time a squash is grown or harvested and more to do with the sustainability of a squash. You see, summer squash like zucchini, yellow […]
Plum Pickin’ Pineapple Jam
July 18, 2012 By 12 Comments
This time of the year our pantry and refrigerator is overloaded with all kinds of delicious produce. Most recently, with the help of Bountiful Baskets we have received an overabundance of fruits like cherries, peaches, nectarines, plums and pineapples. So much so that even my large family cannot keep up. What’s a girl to do? […]
Ingredient-Challenge Monday: Very Berry Fruit Bowl with Spiced Whipped Coconut Cream
July 9, 2012 By 19 Comments
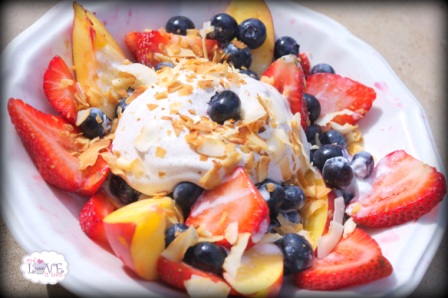
Happy Ingredient-Challenge Monday, everyone! I hope you are brimming with excitement…if the recent entries are any indication; I cannot wait to see what you have for us this month. I don’t know about you, but I have had a great day! Yes, I know it’s Monday, but this really was a great day. Why you […]


