
Just a few days ago, I talked about how my family has honed in on one essential oil brand that we trust. With this, I promised to share some of my favorite oils and different ways that we use them. This recipe is made with our protective blend. Filled with essential oils of: cinnamon, […]
Roasted Garlic Baba Ghanouj
August 7, 2013 By 7 Comments
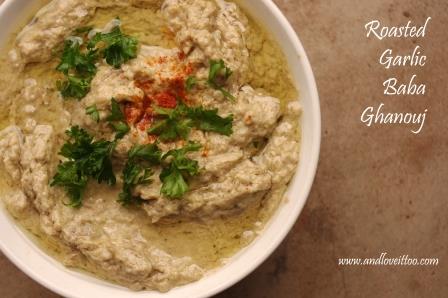
Baba Ghanouj (Baba Ghanoush) is a naturally gluten-free, dairy-free Middle Eastern dish that is typically served with pita bread and/or vegetables. In our battle against Candida, I have found that dips and sauces have become more important to our daily routine. First, kids love to dip their food. Last night we had roasted cod fish, […]
Easy Peasy Healing Bone Broth
July 17, 2013 By 10 Comments

If you do a general search on the healing powers of bone broth, you will come up with more than 50,000 articles, blog posts and references with why you should incorporate this amazingly simple remedy into your diet. Known especially for its power to heal the gut, bone broth is something I managed to add […]
Candida Friendly Cucumber Salsa
July 10, 2013 By 15 Comments
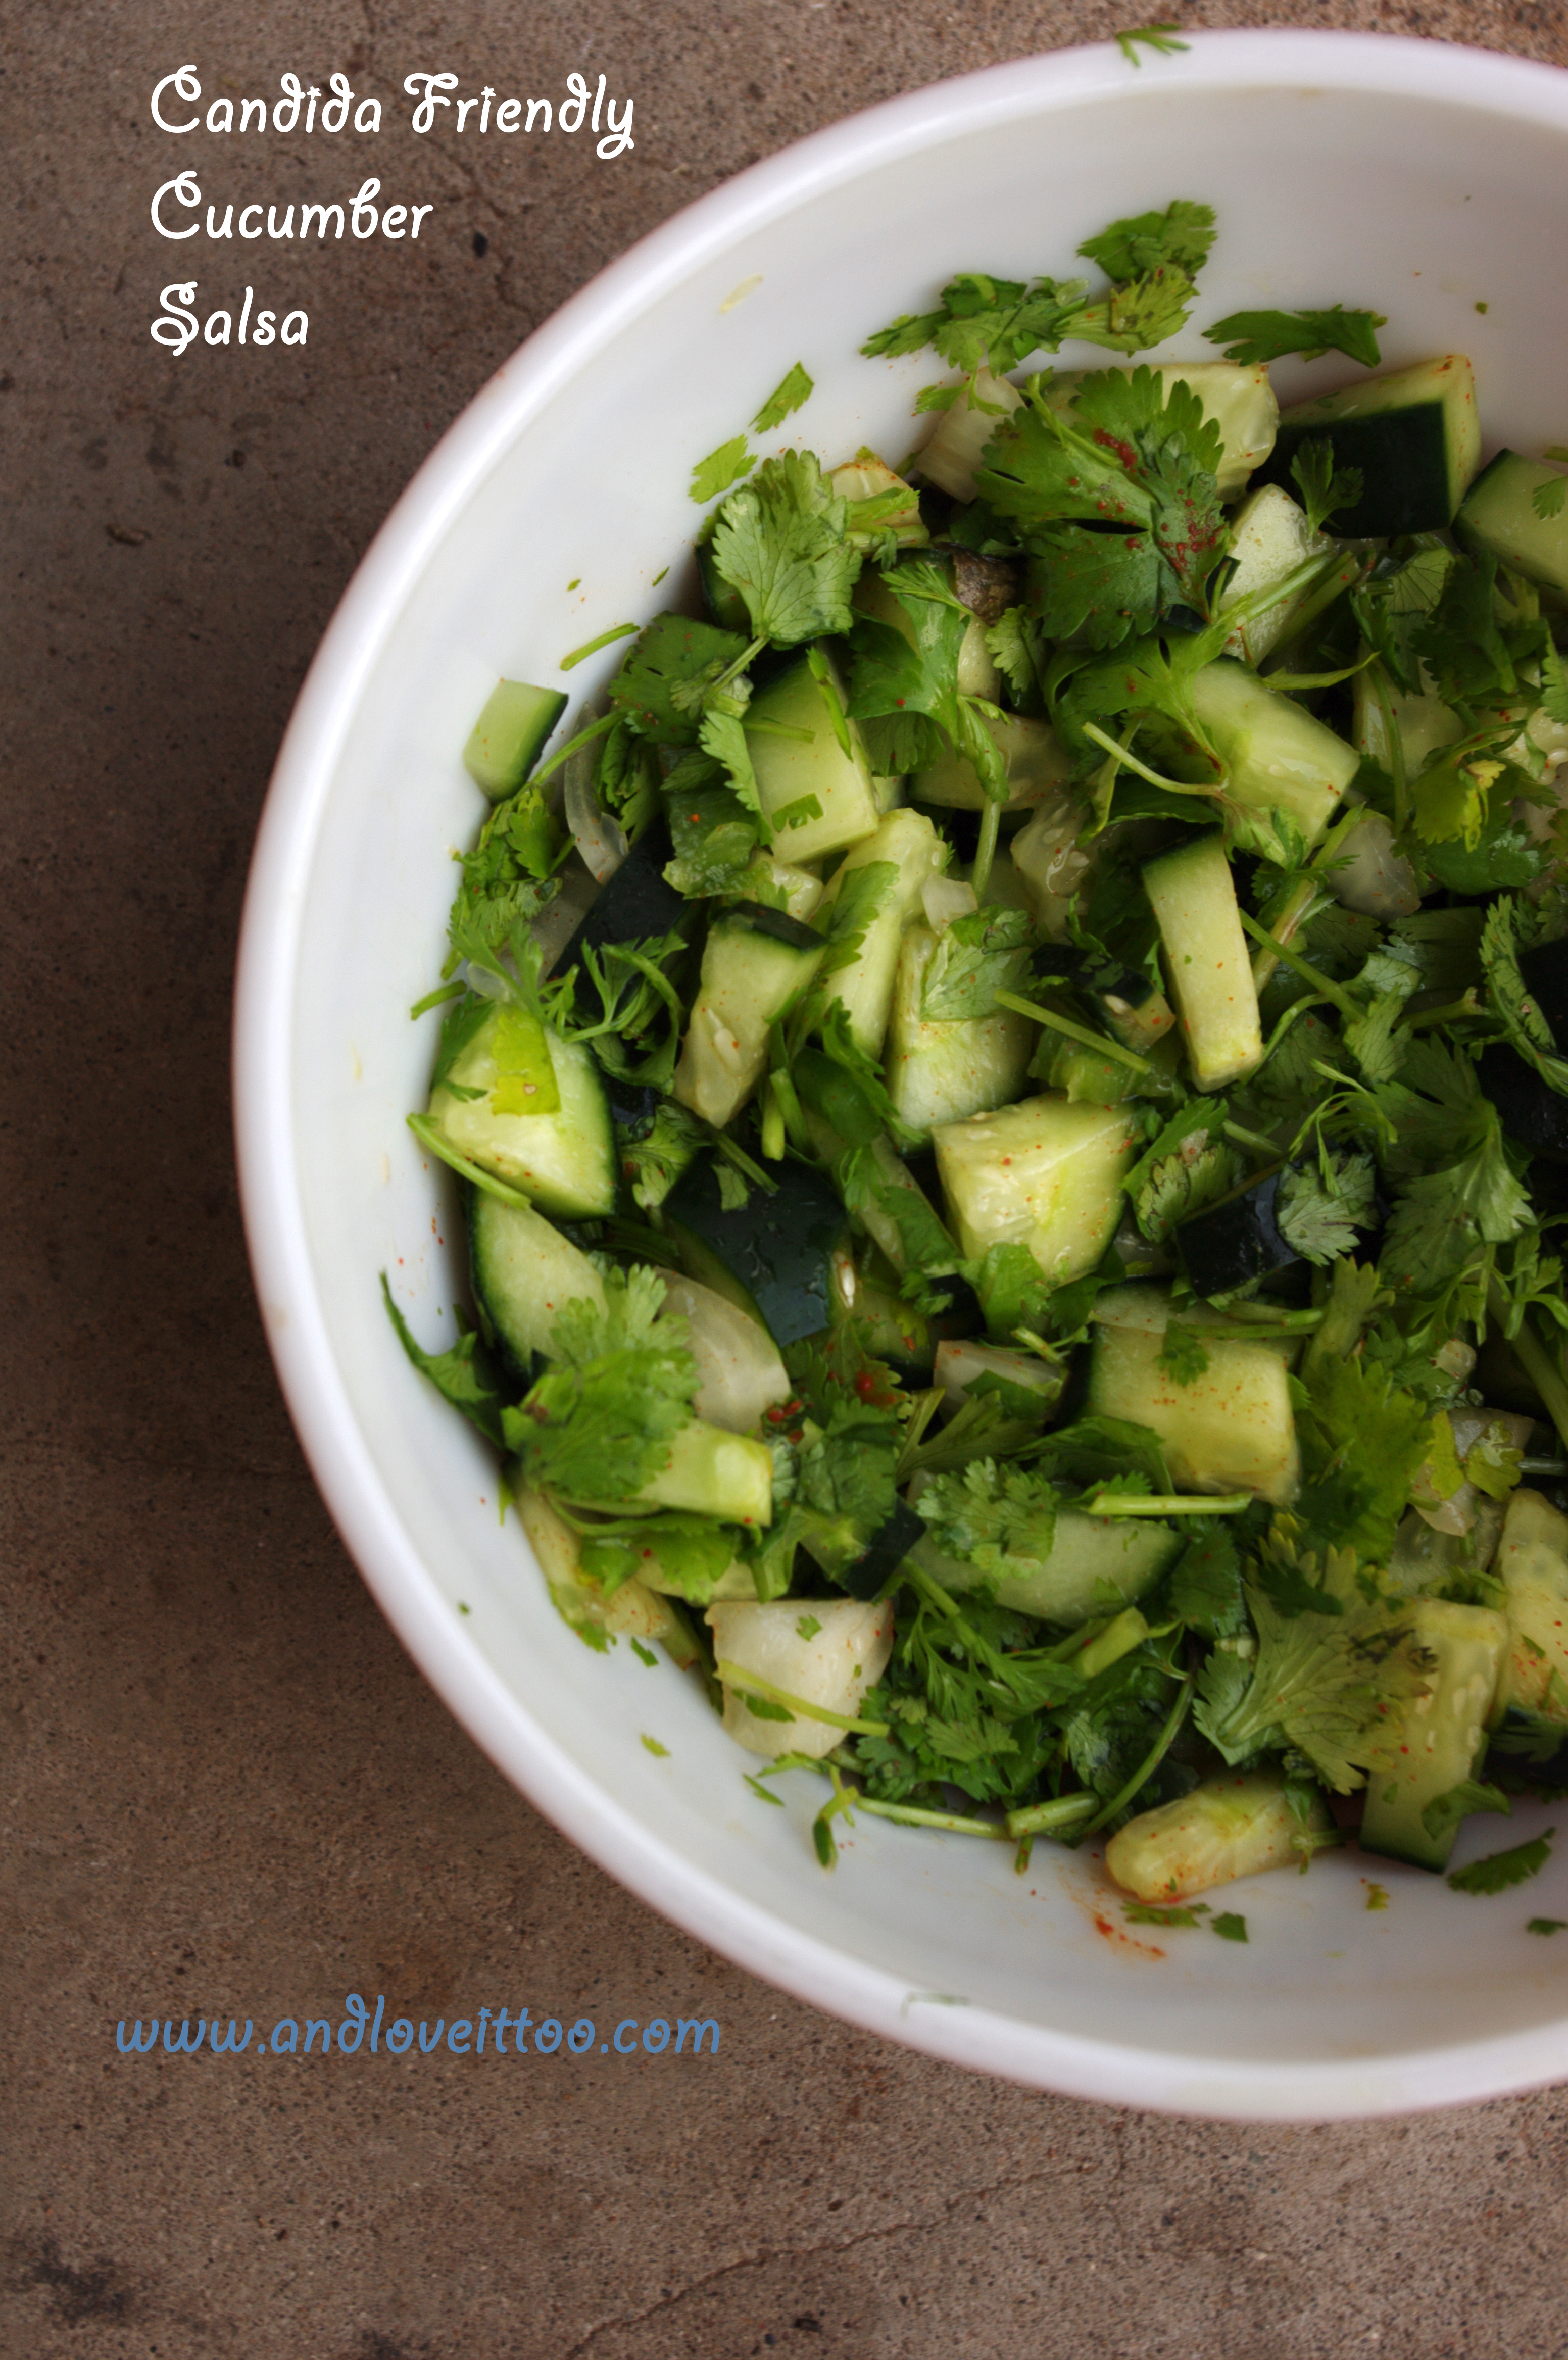
My long-time readers have seen me, and thereby this website, through a number of new eating adventures…new diagnosis and many trial and errors. As you know, I have celiac. Two of my 5 children show signs of gluten-intolerance but have not tested positive for celiac. Still, maintaining a gluten-free lifestyle has benefited them greatly. Even […]
Paleo/Autoimmune Granola
June 2, 2013 By 12 Comments
Hi there! I know it has been a while but wanted to send a big “thank you” to everyone who has stuck by me and continued to support this site and helped my social media connections to grow, despite an extended time away. Today, I am sneaking in under the radar to enter one of […]
Coconut Flour Country Biscuits
February 27, 2013 By 21 Comments
Biscuits are one of those cherished southern foods my grandfather was an expert at. Learning how to make these dairy-free proved to be a mild challenge…making them gluten-free? Difficult to say the least. My largest challenge came after discovering that I am sensitive to nuts. Over the last several years I have played with dozens […]
Pomegranate Balsamic Roasted Brussel Sprouts
January 21, 2013 By 8 Comments
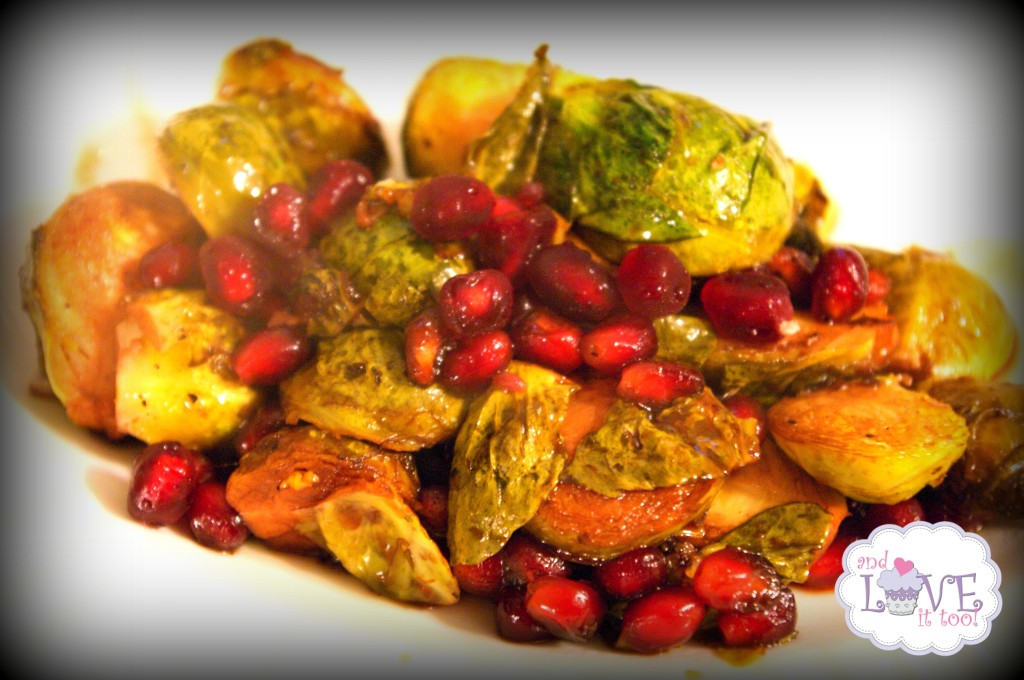
Just over one month ago, I gladly shared the secret that got my children to eat brussel sprouts. These lemon-infused brussels made it easy to deceive my children into trying more than just one bite and helped them discover that they like brussels. Only, I don’t like deceiving my children. And while these brussels defy […]
Autoimmune-Friendly Paleo Apple Sausage
January 12, 2013 By 9 Comments
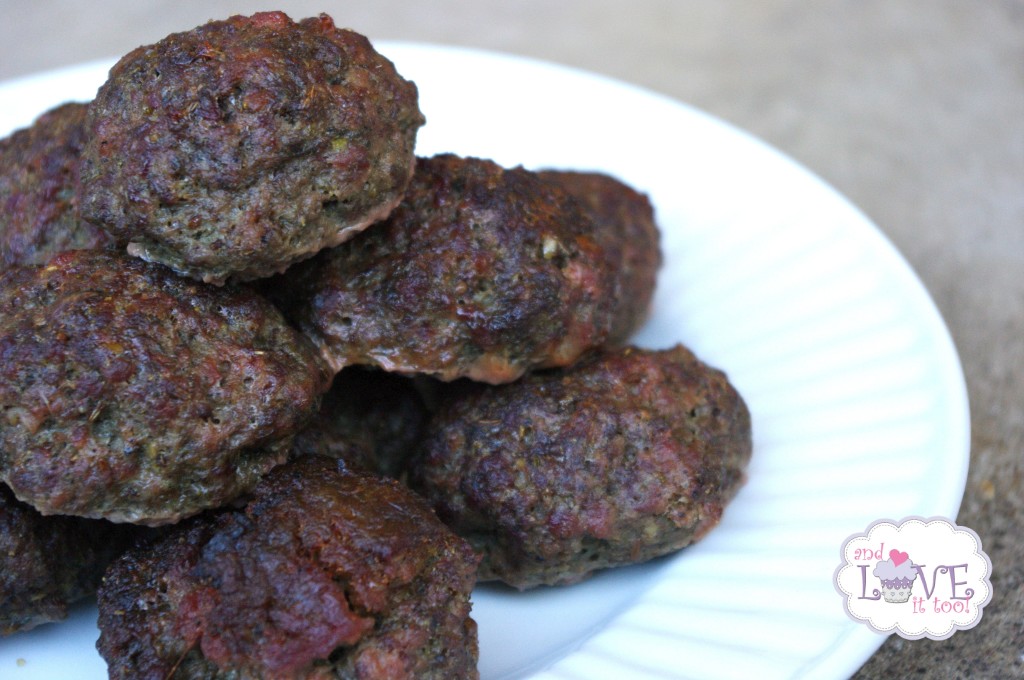
To my readers on Facebook who were expecting this recipe earlier today, my apologies. An impromptu date with my husband took priority, although I am excited to be able to get this recipe to you tonight. I first created this sausage back when I did my first Whole30 and needed something that was quick yet […]
Sweet Potato Hasselbeck Potatoes
January 9, 2013 By 13 Comments
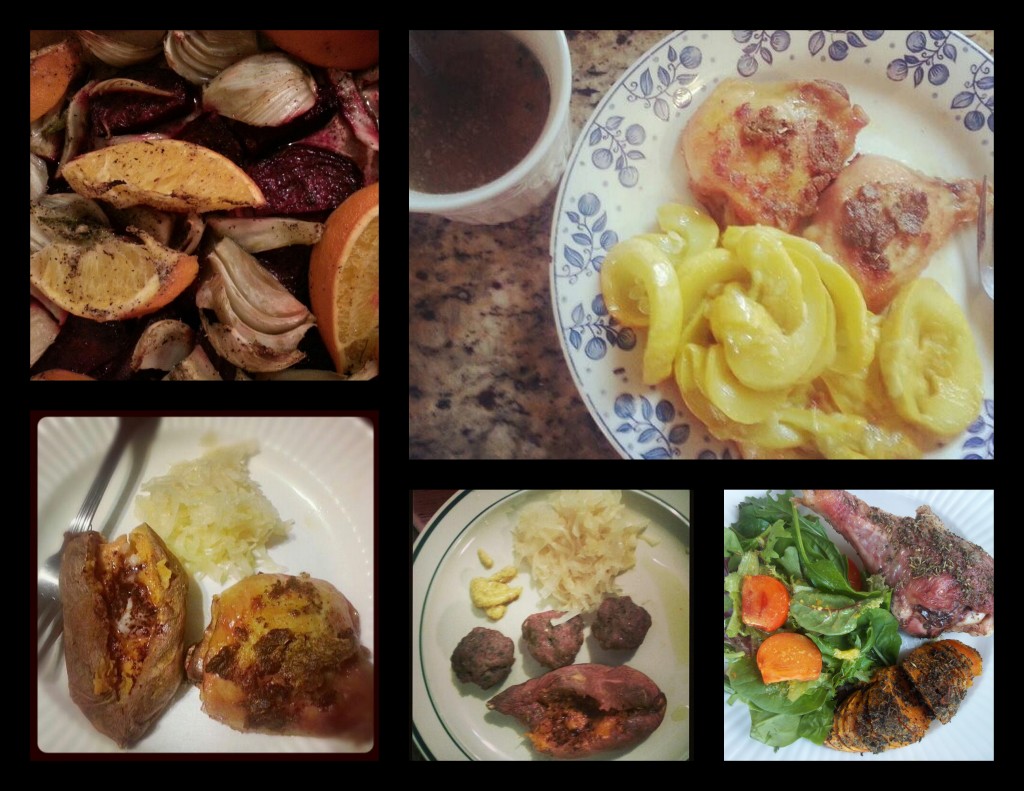
If you follow me on Facebook, Instagram or Twitter, undoubtedly you have seen some of the photos of the lovely meals my family and I have been enjoying recently. Funny thing? In addition to our usual grain-free and dairy-free fare; every meal I have made and every meal I have photographed over the last five […]
Paleo Garlic Cheese Biscuits
January 2, 2013 By 14 Comments

A few weeks ago, my friend Shirley Braden from Gluten-Free Easily posted her recipe for Garlic Cheese Biscuits. When she shared the link over on Facebook, I commented on how amazing her biscuits looked to which she said: “Sunny, I’m looking for you to make a grain-free version. I haven’t gotten to that yet, but […]


