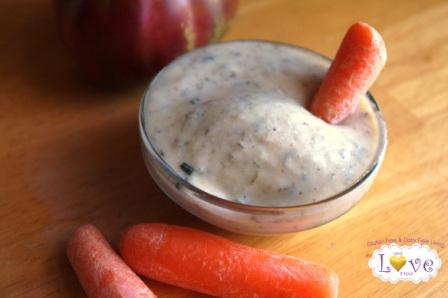
Ranch dressing. Who doesn’t love ranch dressing? Well, okay, maybe people who can’t have dairy…and people who don’t like preservatives and unnatural chemicals in their dressing. I happen to love the flavor of ranch dressing, but I do not like what dairy does to me, nor do I love preservatives or unnatural chemicals in my […]
Molten Lava Cake (Gluten Free, Dairy Free, Grain Free, Soy Free)
July 19, 2011 By 16 Comments
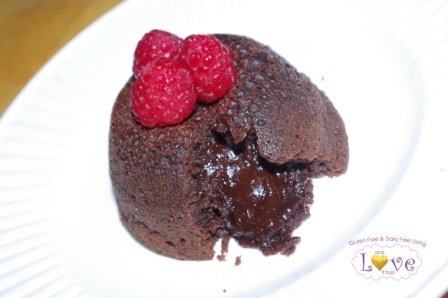
This is not one of those healthy desserts that I so love. This is one of those “I really need a chocolate fix, and not just any chocolate fix, something over the top” desserts that I indulge on just a few times a year. When my family and I took the opportunity to turn a […]
Blueberry Cobbler (Gluten-free, Dairy-Free, Grain-Free, Vegan)
June 20, 2011 By 2 Comments
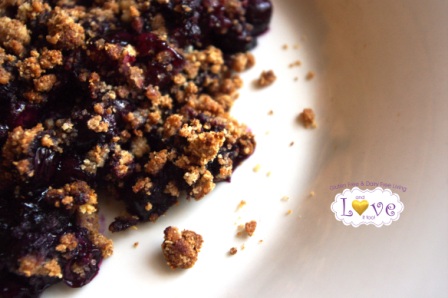
Admit it. Blueberries are ah-mazing. These little sweeties are jam packed filled with nutrition, fiber, and yet manage to bring dessert quality flavor with very few calories. From traditional blueberry pies to frozen blueberry sorbet, these luscious little loves are the perfect summer treat. This blueberry cobbler is a healthy twist on a classic dish. […]
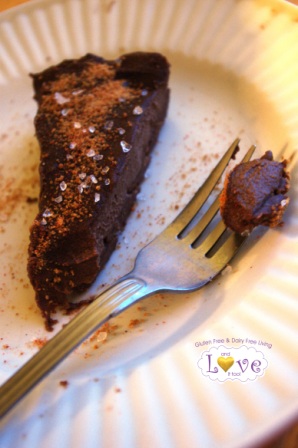
Celiac Awareness, Memorial Day and my fabulous Salted Cayenne Roasted Carob Cheesecake (Gluten-Free, Casein-Free, Grain-Free, Vegan)
May 29, 2011 By 2 Comments
May is a very important month for our family. A month dedicated to Celiac Awareness, I have found many reasons to share why it is I eat the way I do, and why I participate in the blogging community the way I do, this month. Unfortunately being the last month of school, as a teacher […]
GF/CF Baked Vegan Jalapeno Poppers
May 3, 2011 By 4 Comments
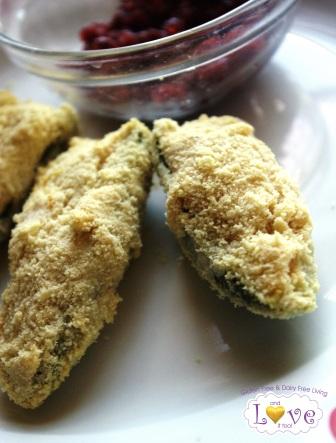
Warm, spicy, crisp peppers. Hot, melted cheese. Crunchy breaded exterior. I challenge you to find a greater appetizer than jalapeno poppers. The cream cheeze used to fill these beauties is so great by itself, I was tempted to just stop there and eat it up…but after my son had asked me more than a dozen […]
Vegan Nutty Butter Easter Candy
April 19, 2011 By 5 Comments
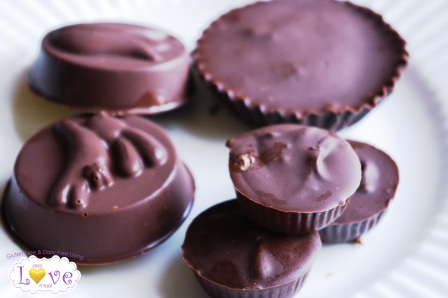
🙂 I have had the intention to make Gluten Free-Dairy Free Nut Butter cups for my kids for a while now. With Easter quickly approaching, the television heavily laden with Reese’s commercials and the grocery aisles loaded with these smooth, creamy treats, well…it seemed about time to make my kids a treat they so readily […]
Sugar- Free Raw Vegan Lemon Cheesecake, Ingredient-Challenge Monday
April 11, 2011 By 8 Comments
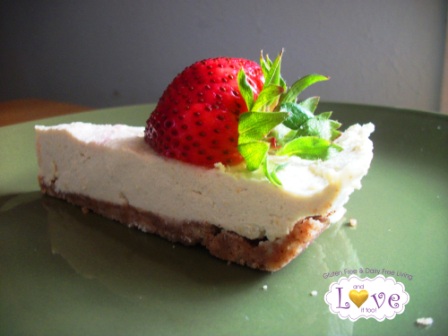
When Shea (aka Dixie Chik Cooks) and I agreed that lemon would be the Ingredient Challenge for this week, my mind started wandering. I love lemon. Lemon bars, lemon meringue, mint lemon julep (sans alcohol), lemon mint cake, lemonade, strawberry lemonade, raspberry lemonade, lemony citrus shortcake cookies, mmmm strawberry lemon cupcakes…so many ways to use […]
Ingredient-Challenge Monday Vegan Red Velvet Whoopie Pie (Gluten Free, Diary Free, Egg Free, Soy Free, Corn Free)
February 14, 2011 By 6 Comments
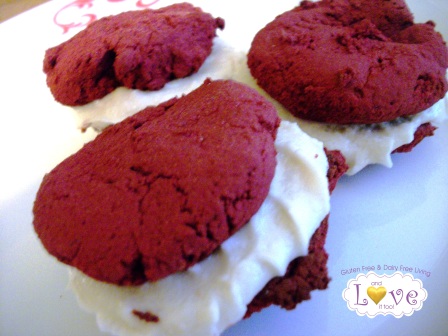
Ingredient-Challenge Monday Vegan Red Velvet Whoopie Pie (Gluten Free, Diary Free, Corn Free) When my Ingredient-Challenge Monday Girls came to the decision that we should do a “something red” special for Valentine’s Day, my mind immediately ran to favorite ingredients like strawberries, raspberries, even cherries. Then, I went shopping with my husband…my gluten loving, dairy […]
Sausage Cheeze Balls (Gluten Free, Dairy Free, Casein Free)
February 6, 2011 By 1 Comment
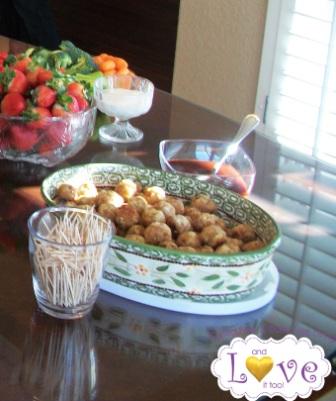
As my family sits and anxiously awaits our guests for tonight’s big football event, I thought I would share a recipe which has quickly become a favorite for parties, bridal showers, baby showers and just because. Inspired by the classic Betty Crocker recipe for Sausage Cheese balls; using the new Gluten Free Bisquick and our […]
Vegan Salted Cayenne Dark Chocolate Almond Fudge (Gluten Free, Dairy Free, Soy Free)
December 17, 2010 By 12 Comments
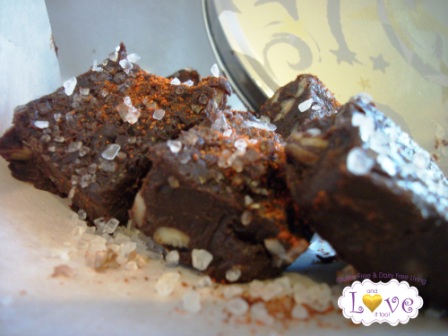
Gourmet chocolates have brought us all kinds of zany combinations. Chocolate covered fruit, gummy bears, peppermint sticks or even biscotti…each and every combination has its own unique taste and texture, each just as exquisite as the next. Nearly two years ago I had my first taste of pepper infused chocolate with a hint of sea […]


